

Adesso Setup Wizard Guide
June 2023
Table of Contents

Welcome to Setup the Wizard .......................................................................................................... 3
Let's Get Started ............................................................................................................................... 3
Login Screen ..................................................................................................................................... 3
Welcome Screen ............................................................................................................................... 4
Navigation ........................................................................................................................................ 4
Products ........................................................................................................................................... 5
Distributor DCs ................................................................................................................................ 6
Distributor Indirect Retailers .......................................................................................................... 7
Other Customers .............................................................................................................................. 8
Fiscal Year Calendar Set Up ............................................................................................................ 9
Forecast .......................................................................................................................................... 11
Funds Screen ............................................................................................................................. 12-13
General Ledger Accounts ............................................................................................................... 15
Set Up Your Flamingo Users .......................................................................................................... 16
Set Up Your Flamingo Security ...................................................................................................... 17
Finalize the Setup Wizard .............................................................................................................. 18
Questions? ...................................................................................................................................... 18
Welcome to the Setup Wizard
The Setup Wizard will assist you in gathering the initial data required to set up your new Flamingo TPM system. The Flamingo Setup Wizard is a user-friendly, online tool that will walk you step-by-step through each category of the Flamingo set-up process. Each screen contains an “Instructions” button at the top of the page to help guide you in entering and editing the required information for your Flamingo system and help you to relax.
Let’s Get Started
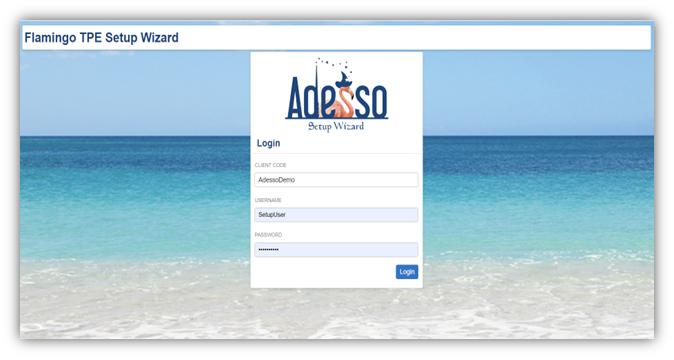
Login Screen
You will receive your login and password via email.
Only one user can use the Wizard at any given time.
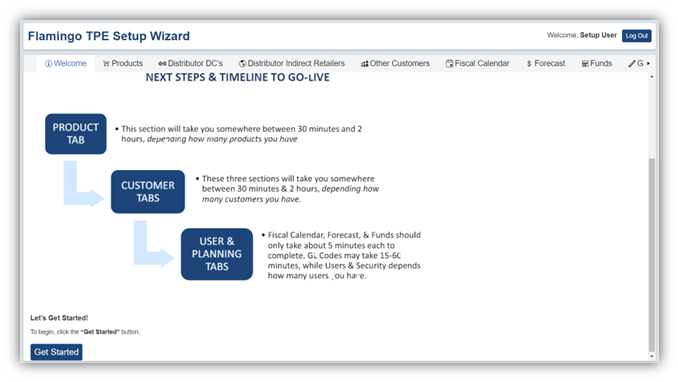
Welcome Screen
Select the ![]() button to begin the Flamingo requirements.
button to begin the Flamingo requirements.
Navigation
Each screen in the Wizard allows you to move to different screens with ease.
You can move back to the screen you just completed or forward to the next screen from your current screen by:
-
-
- Clicking on “Previous” to move to the last screen.
- Selecting “Continue” to move to the next screen.
- You can jump back or forward to any screen by clicking on the screen name at the top of the Wizard.
- Click “Get Started” to get going.
-
Products
This section of the Wizard displays all promoted groups and SKU level information, including units per count and price. Your Product information is already in the Setup Wizard, synchronized from your accounting system. By default, you can make your adjustments directly in the Setup Wizard below, or you can download your data and make necessary edits in Excel.
The best practice is to plan deals within promoted groups (as opposed to individual SKUs). To create a seamless transfer of information, we recommend that your products need to be organized by promoted groups within your ERP data transfer.
In the Wizard, simply review promoted groups & SKUs listed for accuracy. If promoted groups and SKUs listed are not active for Flamingo, these can be unselected by unchecking the box under import. Make sure to deselect any unsaleable items such as samples or cardboard displays.

If you unselect a promoted group, it will automatically unselect any SKUs underneath.

QuickBooks typically defines “Units of Measure” as cases.
If a client uses a separate unit of measure, such as weight, Flamingo supports this as well. To update a product simply click the “Edit” button and “Update” the fields using the up and down arrows or typing in the value, then click “Update”.

Important note: It is required that the following occurs prior to completing the Wizard:
-
-
- Update this to “Units per Count” field within QuickBooks.
- Review and edit “Units per Count” and price.
-
- “Units per Count” – number of units in each case.
- “Price” should be list case price sold to customers.
-
-
Distributor DCs
This tab links the distributor DCs from your accounting system with the equivalent DCs within Flamingo. We know which key accounts typically draw from which locations, however if you have alternative arrangements, change that in this tab. If they already appear to be correctly linked, simply save & move on to the next tab.
- On the left side under ‘Flamingo Available Distributor DCs’, is a list of preset KeHE & UNFI Distributor DCs.
On the right side under ‘Client Customer List’ is the data gathered from your accounting system that contains all your customers, as well as your Distributor DCs
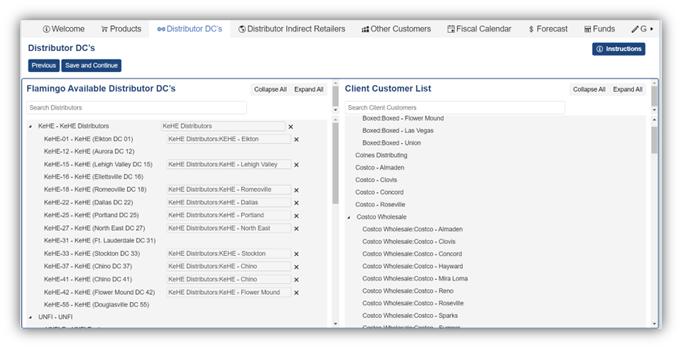
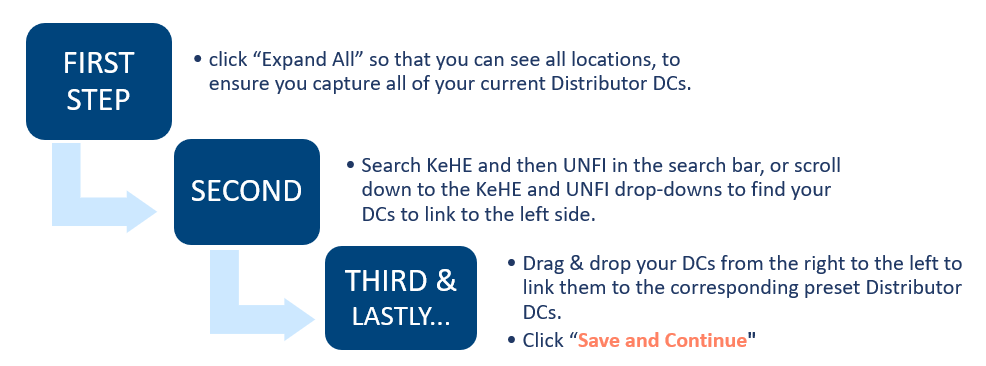
- If you cannot find one of your DCs on the right to link to the preset one on the left, please email support@adesso-solutions.com to have it added.
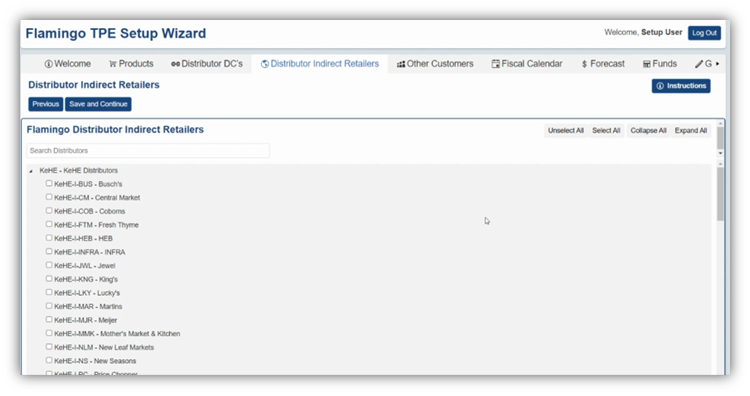
Distributor Indirect Retailers
This tab is for you to select which Distributor Indirect Retailers you have promotional planning with that you would like to track in Flamingo.
- Click “Expand All” to the right of the screen & check the boxes for the retail partners you have Ads, Flyers, Sales or any promotional activity you’re planning on executing against in the FY.
- Click “Save & Continue”
Other Customers
This tab is for you to select which Direct Retailers you have promotional planning with that you would like to track in Flamingo.
- Select or deselect any checkbox to the right on the line of the retail partners you have Ads, Flyers, Sales or any promotional activity you’re planning on executing against in the FY.
- Click “Save & Continue”

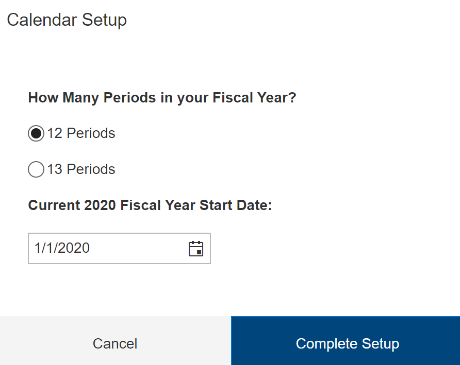
Fiscal Year Calendar Set Up
The Flamingo System defaults to a true calendar year and calendar months with a start date of January 1 and end of December 31. However, you can customize the calendar in the Wizard to match your fiscal calendar.
- The Wizard by default will create 3 fiscal years:
- Previous Year (2022)
- Current Year (2023)
- Next Year (2024)
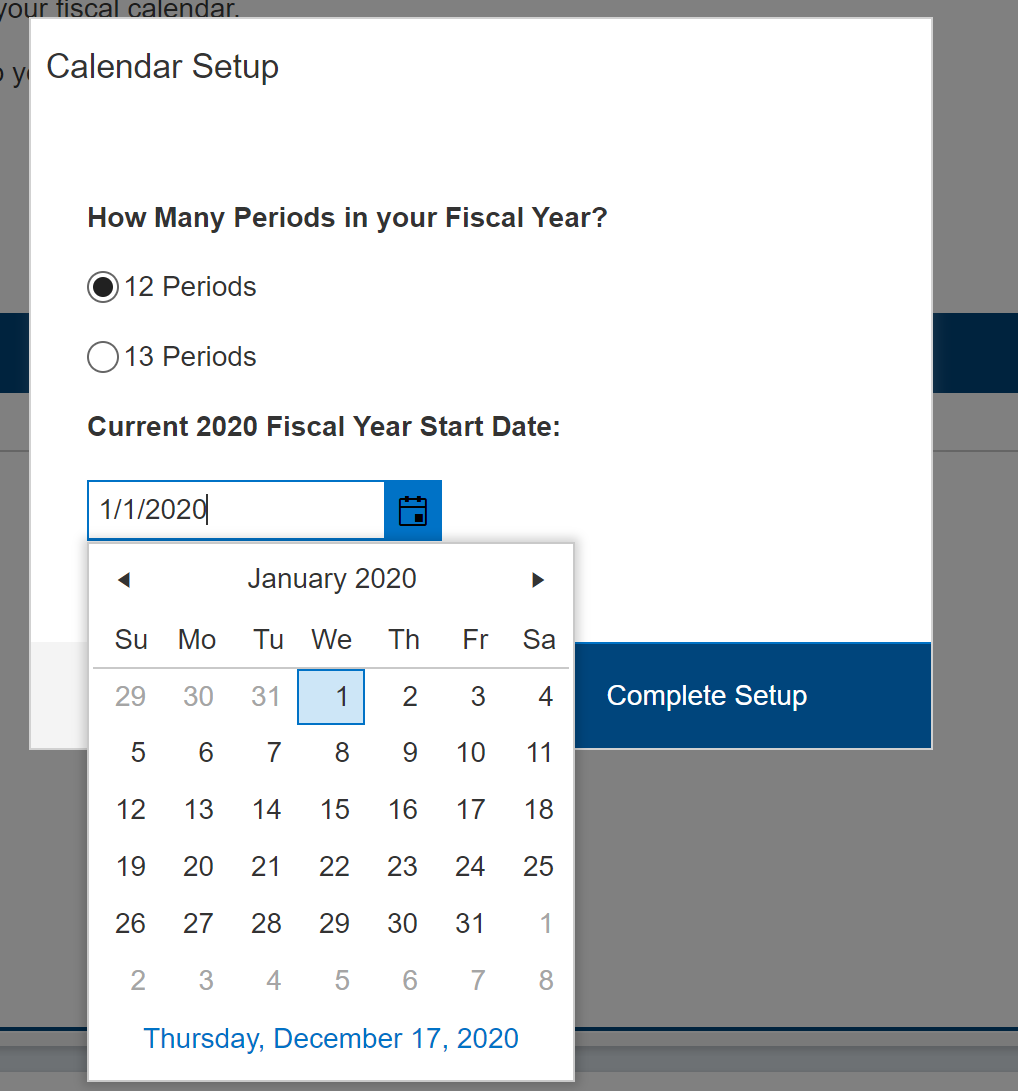
- If your fiscal year does not start on the calendar year, click on the calendar icon, and use the arrows when your fiscal year begins, once entered click complete setup.
- You can edit each fiscal year’s start and end date if needed by selecting the “Edit” button to the right.

- To review calendar years, expand the section by clicking the arrow key for start and end dates of each period. If you need to adjust the period, you can change the date by clicking on the calendar icon by manually typing in the period start and end dates.
- Click on the “Update” button to change/update the dates.

- Once complete click “Continue” and you will be brought to the next screen.

Forecast
In this tab, you’ll define your total Forecasted Revenue for your Fiscal Year. The forecast is based on the previous year, plus or minus new business. Take some time with this tab and make your projected estimate to begin to measure your business against the forecast. This can be adjusted in Flamingo as needed.
TIP: New manufacturers will want to discuss with broker, key accounts, and distributor partners.
Listed in this Tab are 3 Fiscal Years:
- First is Actuals from Prior Year
- Second is your Current Year
- Third is your next/future fiscal year
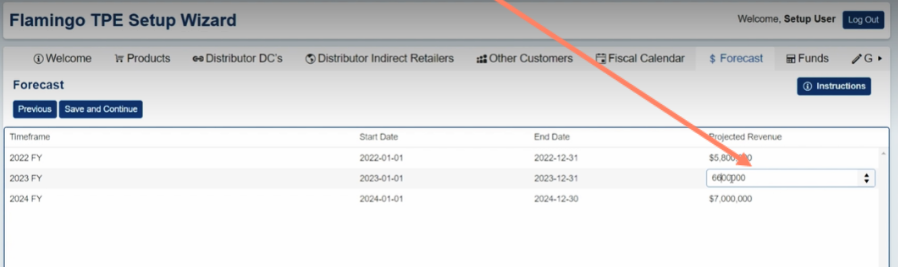
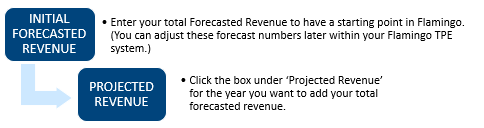
Once you have updated all three boxes, click “Save and Continue” to complete the Forecast tab.
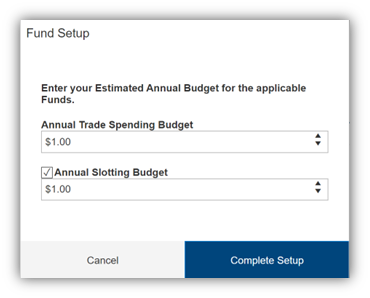
Funds Screen
In Flamingo, “Funds” refers to trade budgets. The approved dollar amount set aside to spend each year for trade may be broken down into two default categories. (The Wizard currently only addresses fixed fund amounts, so if you have variable funds, the Adesso CE team will work with your team outside the Wizard).
- Trade Funds - Targeted spending with retailers to drive growth. This includes your MCBs, Displays, Ads & SCANs, etc.
- Slotting – Non-working trade that does not get to your end consumer – this includes your Free Fills, administrative fees, short code fees, etc. (see your Adesso Solutions Knowledge Base for more examples of both).
To enter annual dollars budgeted for trade spend:
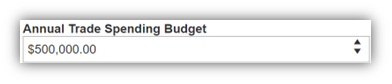
Either use up and down arrows to add or remove dollars or manually enter in dollar amount.
You can review funds and edit amounts by clicking the “Edit” button.

Manually enter in amount or use up and down arrows to add or remove fund dollars.
To save changes click “Update".

Once fund entries are complete click “Save and Continue”.
Customers
In the customer screen, you are able to categorize and build your basic customer hierarchy using the “Bill To” and “Ship To” customers from your QuickBooks environment.
-
-
- We recommend only importing customers whom you run promotions/deals.
-
- As an example, not the direct to consumer customers.
-
- Additional Hierarchies will be developed in a subsequent phase of the Flamingo Setup.
- We recommend only importing customers whom you run promotions/deals.
-
It is not always possible to deactivate customers in QuickBooks. For non-trade customers, uncheck the import box to have customers not appear in Flamingo.

Clicking the arrows will expand your “Bill To” customer. If unselected a “Bill To” will automatically, unselect a “Ship To”.

Click “Save and Continue”.
General Ledger Accounts
Flamingo imports the General Ledger (GL) account setup in QuickBooks, and this will include all GL accounts in your QuickBooks environment.
To remove any GL accounts not related to trade spending, uncheck the box under the import field.

Click “Save and Continue”.
Please reference your Adesso Solutions Knowledge Base for a GL Code Glossary of Terms.
Set Up Your Flamingo Users
This is a list of users that will have access to your Flamingo System.
Click “Add New User”.
Create login code: Insert first initial and last name.
Fill out all fields, including the first name, last name, select user group from dropdown, email, address, city, state, and zip code.
Click Update (New user will not be added until you click the update button).

After you have entered all users, click “Save”, which will bring you to the Security tab.
Set Up Your Flamingo Security
In the Security tab, you can update the user’s limits for deals, check requests, and deductions. The security tab also identifies each user’s managing approver for deals & check requests.
- Security Groups – Predefined security settings in Flamingo with your user team of Admins, Broker Admins, Broker Sales, Field Sales, Client Admin, Finance & Executive Management.
- Approval Levels – User privileges & thresholds against spending on Check Requests, Deals & Deductions.
|
Role |
Security Privileges |
|
Super Admin |
All security setting bypass & no spend limits/ typically only for Adesso IT |
|
Broker |
Need all Deals approved |
|
Broker Admin |
Need all Deductions approved |
|
Sales |
$ threshold set by Executive Management |
|
Executive Management |
Can execute all levels of deals & approval actions & cannot change settings |
|
IT |
Can only adjust funds, contacts, customer info, products & vendors. Cannot adjust user security settings. |
|
Finance |
Deduction management insights & privileges only |

Update Security:
-
-
- Select the “Edit” button to the left of each user.
- Select the user’s deal approver from the dropdown
- Enter the user’s maximum deal amount they are able to create without approval.
- Select the user’s request approver from the dropdown.
- Enter the user’s maximum check request amount they are able to create without approval.
- Enter the user’s maximum deduction amount they are able to offset without additional approval.

-
Once you have updated the security for all users, select “Finalize”.

- For small teams, starting out, we recommend assigning one approver for all checks and large deals.
- You can e-mail edits to your team roster & security levels later in Flamingo to Support@adesso-solutions.com
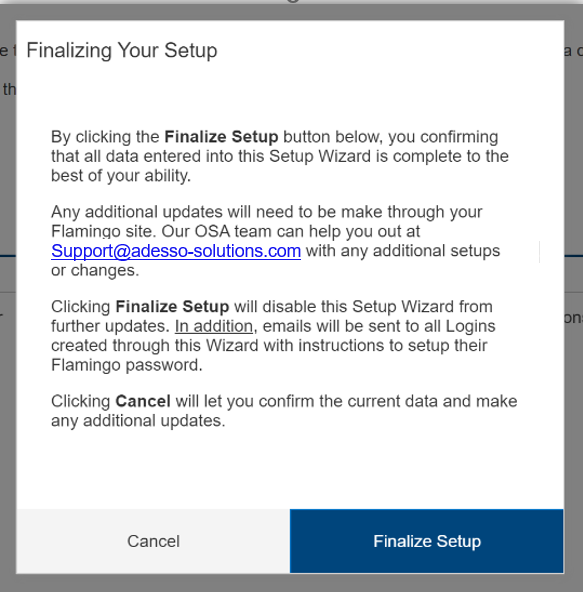
Finalize the Setup Wizard
Congratulations! You have completed all steps of the Wizard.
To complete the Setup Wizard, click “Finalize Setup”.
Questions?
At any point during the initial steps of installing the web connector, please do not hesitate to reach out with questions. Simply send an email with your question to Support@adesso-solutions.com, and we will get back to you right away.
