Guide covers how to set up and process Check Requests using BC & Dynamics.
Table of Contents
- Getting Started – Web Connectors
- Process Overview
- Example Purchase Invoice
- Mappings
- D365 & Post Batch
- Disclaimers
Getting Started
- First, the client will need confirm that they have the following Web Services setup in Dynamics.

A complete list of Web Services should be included with this document.
- Second, Adesso will Verify the Web Services and Load Vendors into Flamingo
Since Vendors in Dynamics are not linked to Customers in any way, these Vendors will be loaded to TOTAL Customer. In other words, all Vendors will be available for all Customers.
If Vendors needs to be only available to specific Customers, this will need to be done with the help of AdessoOSA/Support.
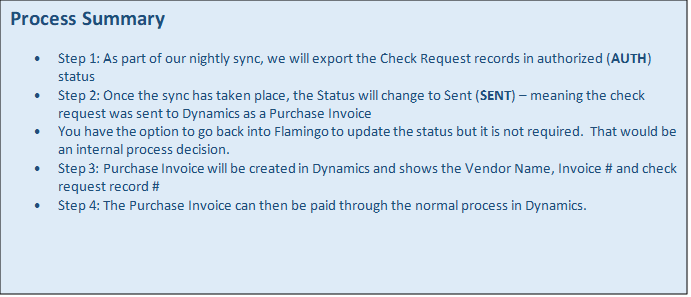
Flamingo Check Request Process
STEP 1: Create Check Request
Login to Flamingo, and from your dashboard, choose the Settlements tab & the sub-menu item - Check Requests. A pop-up will populate with yellow-highlighted fields you’ll need to supply detail for in order to process your check request.
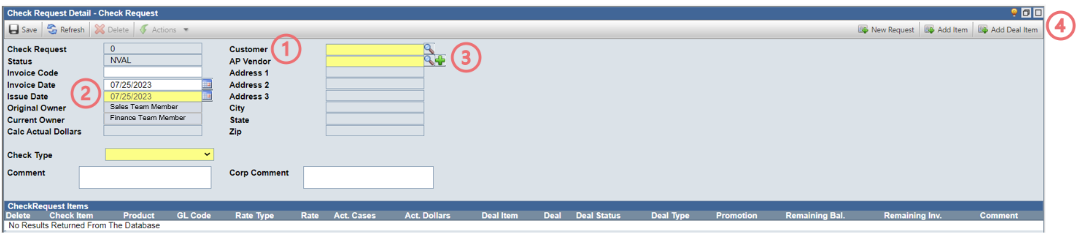
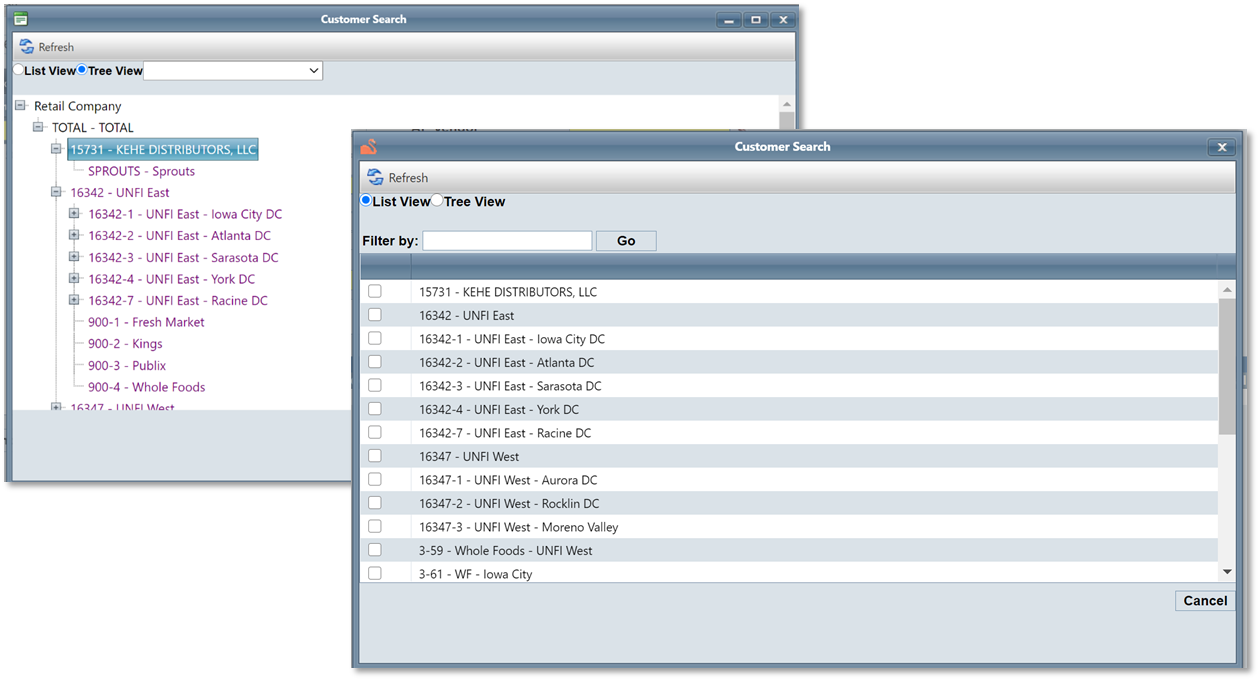
- Select the CUSTOMER for the check request by clicking the magnifying glass & either choosing from the tree-view or filtering from the list-view.
- Choose the ISSUE DATE for your check – you can post-date for future activity.
- Once the customer & check issue date is selected, the AP VENDOR needs to be added. Click the magnifying glass beside AP Vendor to search or +.
- Once the AP Vendor has been selected, you will want to ADD DEAL ITEM – allowing you to make payments against specific deals.
- The Add Deal Item window will open a pop-up window displaying all the Deal Items that are on deals with customer or its children which you selected for the check request.
- The Deal Items have the same data elements as in the Deal Detail.
- If the list is long, you can search using the search fields at the top of each column to filter & narrow the results.
- Once all deal items are selected, choose the Add Items button at the top of the screen

- The Deal Items you selected will appear in the Check Request Items.
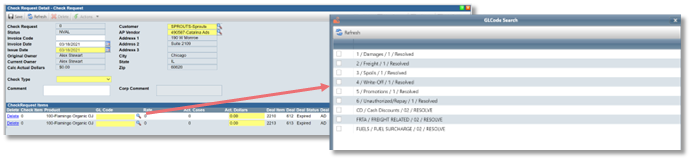
- Select the GL CODE associated with each line item by clicking on the magnifying glass in the GL Code field to bring up the GL Code screen & check the box next to the GL Code you want to use.
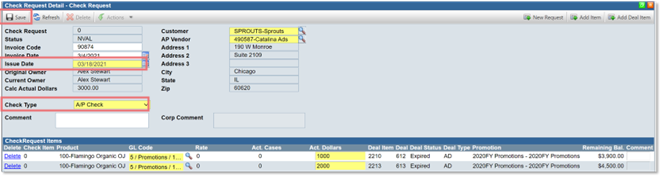
- Enter the ACTUAL DOLLARS you would like to apply within the Check Request.
- After entering the amounts to be applied to the check, select A/P CHECK from the CHECK TYPE drop down & enter in the invoice code.
- When you have completed the Check Detail, select SAVE
- You will need to add your backup documentation. To add backup, select Documents from the activity actions at the bottom of the Check Request Detail screen.

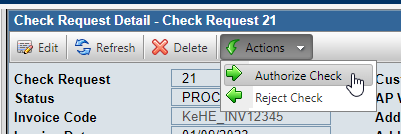
STEP 2: Confirm Check Request is Valid and moved to Authorized (AUTH) Status.
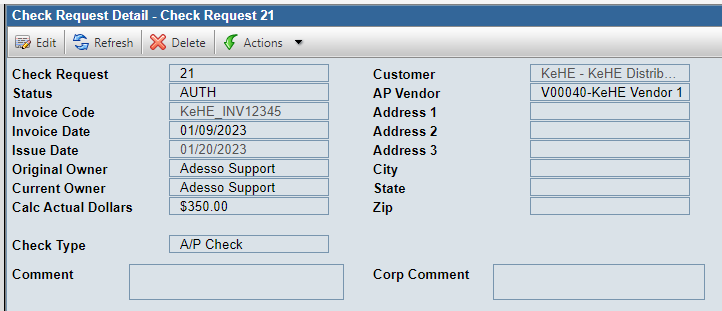
Flamingo Nightly Export will pickup the Check Request, export to Dynamics and set the Status to SENT, completing Step 2.
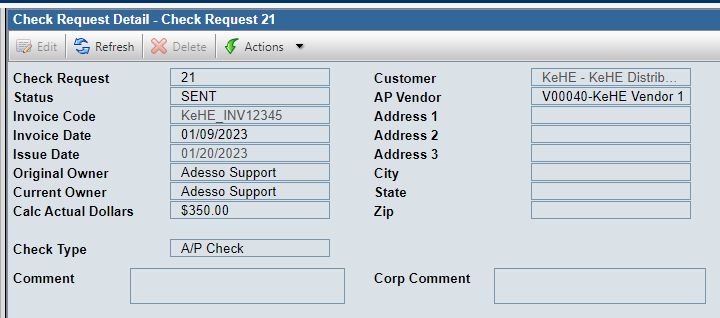
STEP 3: Adesso will create a Purchase Invoice in Dynamics.
STEP 4: Purchase can be reviewed and then Posted.
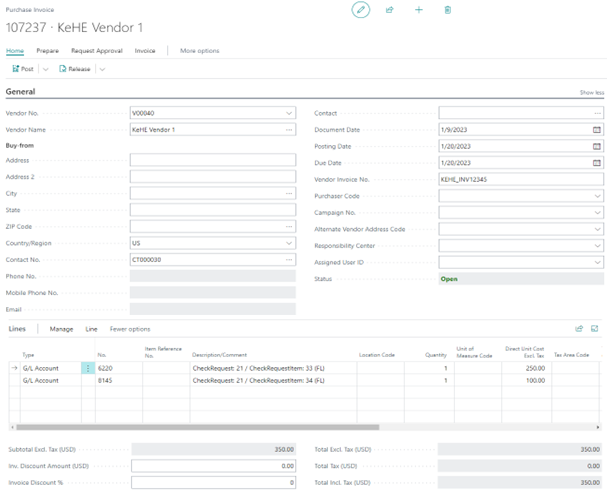
Example Purchase Invoice
Mappings
|
Dynamics Fields |
Flamingo Fields |
Notes |
|
Vendor No (Vendor Name) |
AP Vendor |
Vendor Code in Flamingo must match Vendor No in Dynamics |
|
Document Date |
Invoice Date |
|
|
Posting Date |
Issue Date |
|
|
Due Date |
Issue Date |
|
|
Vendor Invoice No |
Invoice Code |
NOTE: Dynamics will reject this Invoice if Invoice has already been used on Purchase Invoice. |
|
LineItem Type |
“G/L Account” |
Static |
|
LineItem No |
GL Code |
|
|
LineItem Quantity |
“1” |
Static |
|
LineItem Unit Cost |
Act. Dollars |
|
D365 and Post Batch…
D365 should offer you the ability to Post multiple Purchase Invoices with only a couple of steps.
You can select multiple Purchase Invoices from the Purchase Invoice list by:
- Holding your Ctrl key and selecting the Invoices you want to Post. Once you select your 2nd Invoice, you should see Checkboxes appear on the Left Side of the list.
- Select an Invoice and press Ctrl + A which will select ALL Invoices listed.
- Select an Invoice and press either Shift + Up Arrow or Shift + Down Arrow to select Invoices above or below the original selected Invoice.

Disclaimers
The information above was reviewed and tested on D365 Online with the following version:

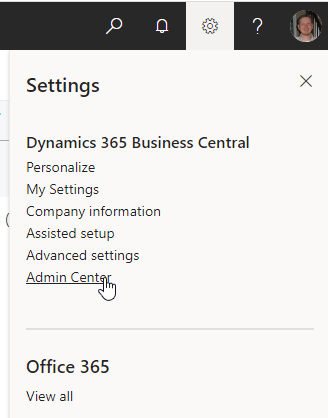
You can get your version by going to Settings -> Admin Center